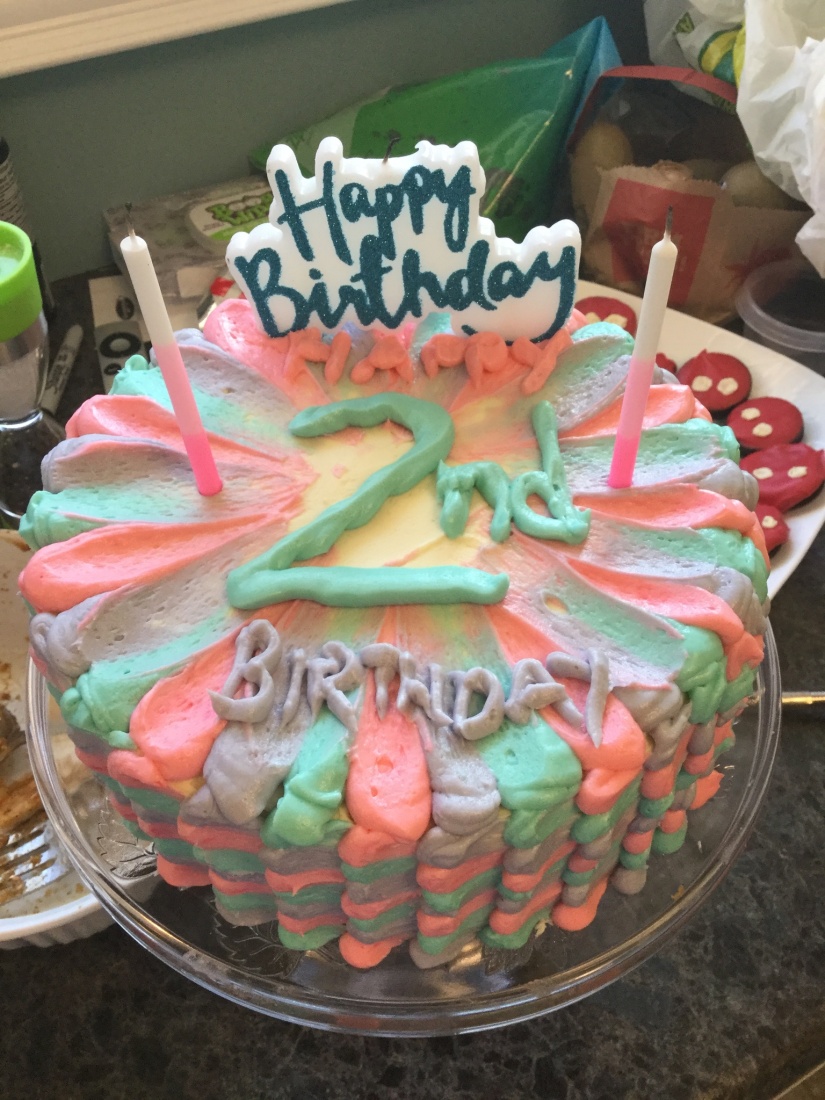
I probably went a bit overboard for my daughter’s 2nd birthday. I had been online window shopping for a cute outfit for her to wear but I couldn’t justify spending $15 on a shirt she’d wear for a day. So it all came back to “what can I make her?”. Now, my birthday is 4 days before hers and this year was a big one. My husband and I spent quite a bit of time getting some house and yard projects finished in time. So needless to say, we were busy.
But just like any parent, we’d do anything for our kids.
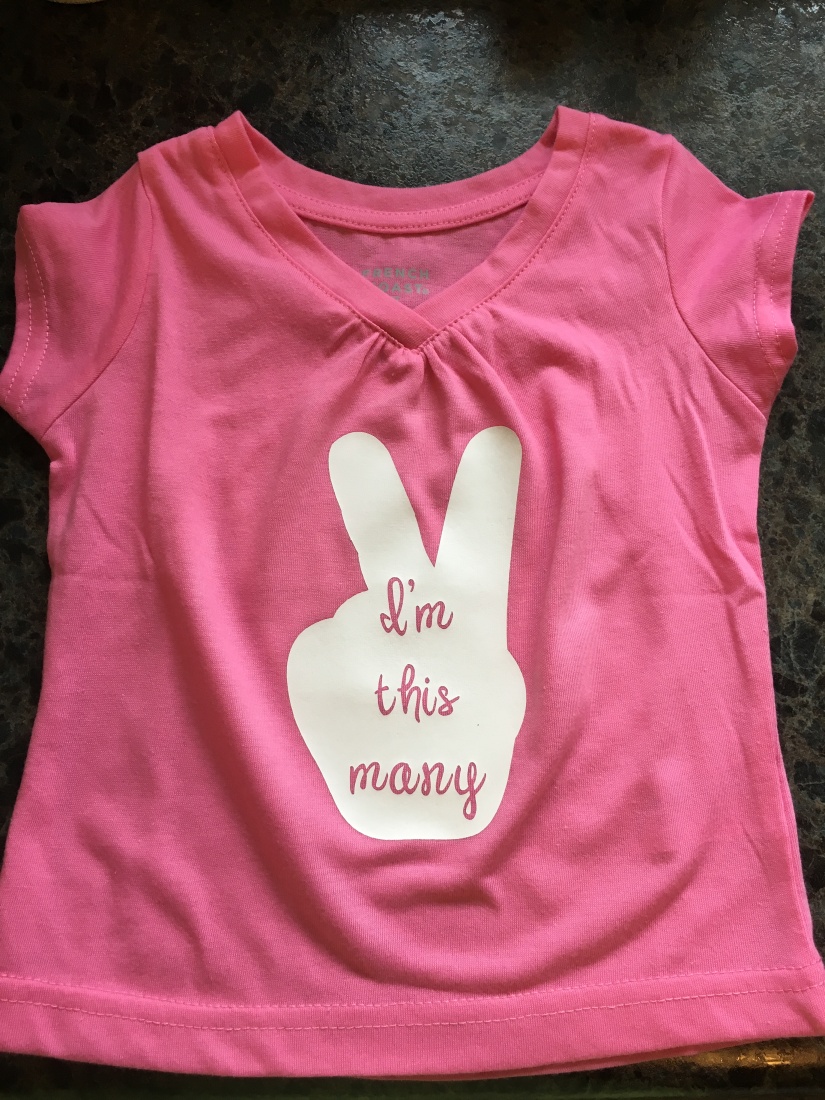
So here’s the top I made for her special day, step by step.
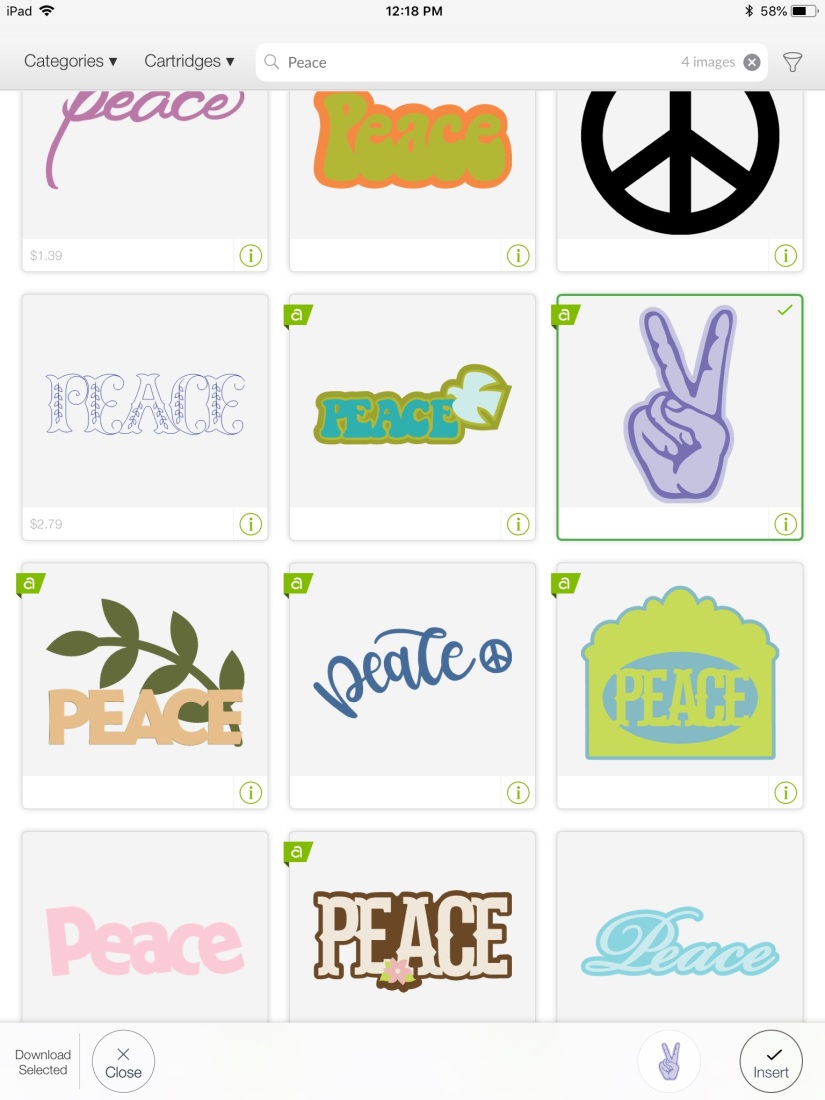
Step 1: I searched peace thinking that a peace sign and the number two are both what I was looking for. I found a design I liked. I didn’t need the details in dark purple, just the outline.
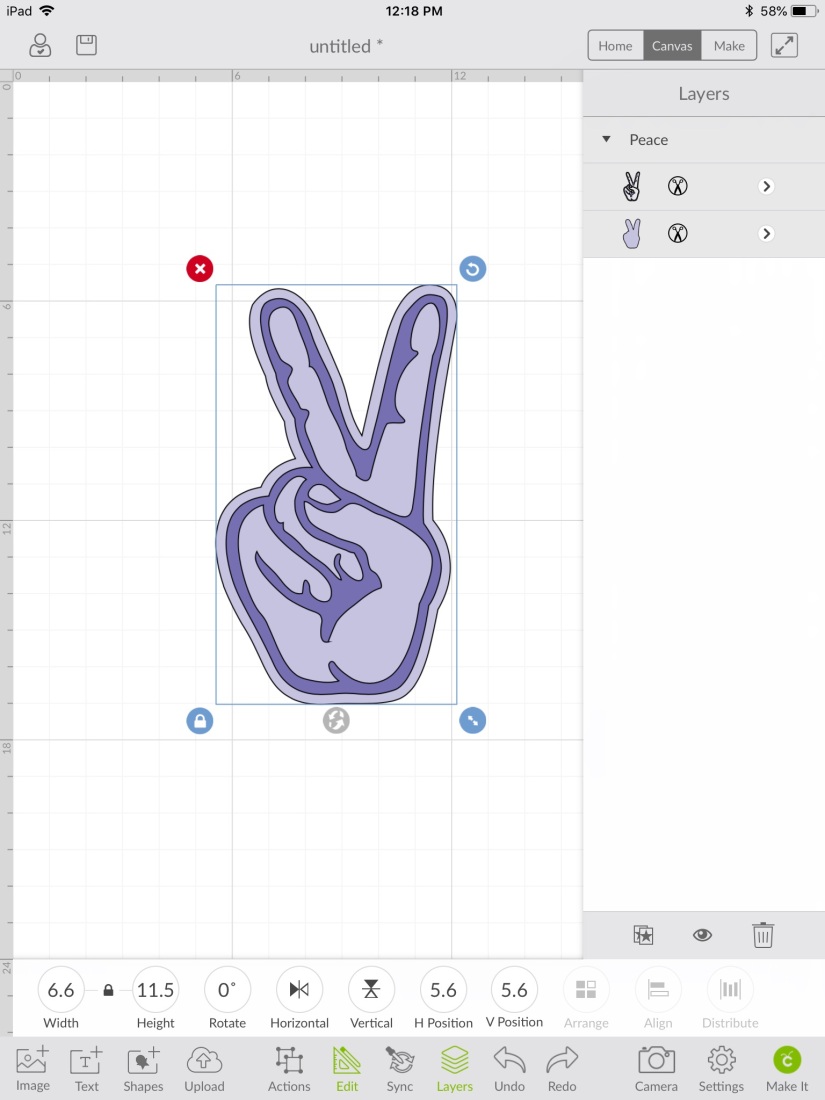
Step 2: Open “Layers” on the bottom panel (I was working on my iPad) to separate the dark and light purple layers.
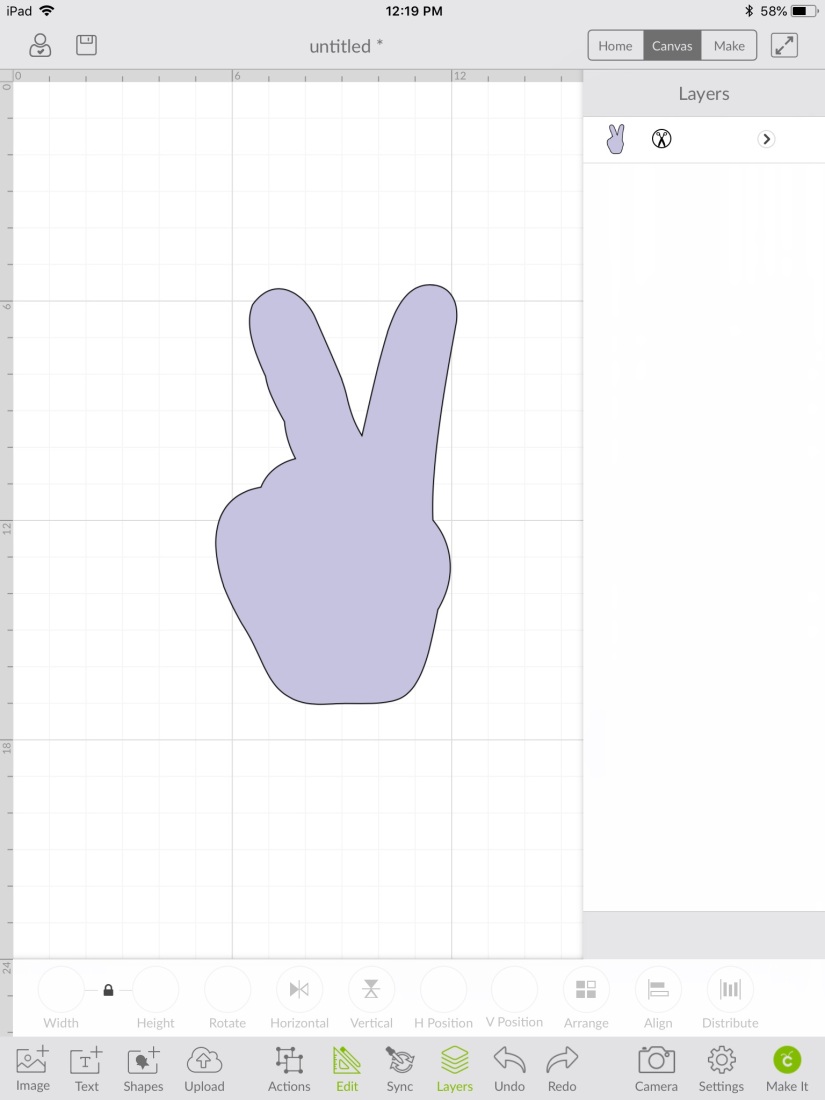
Step 3: Delete the dark purple layer. Now you have the base for your iron-on.
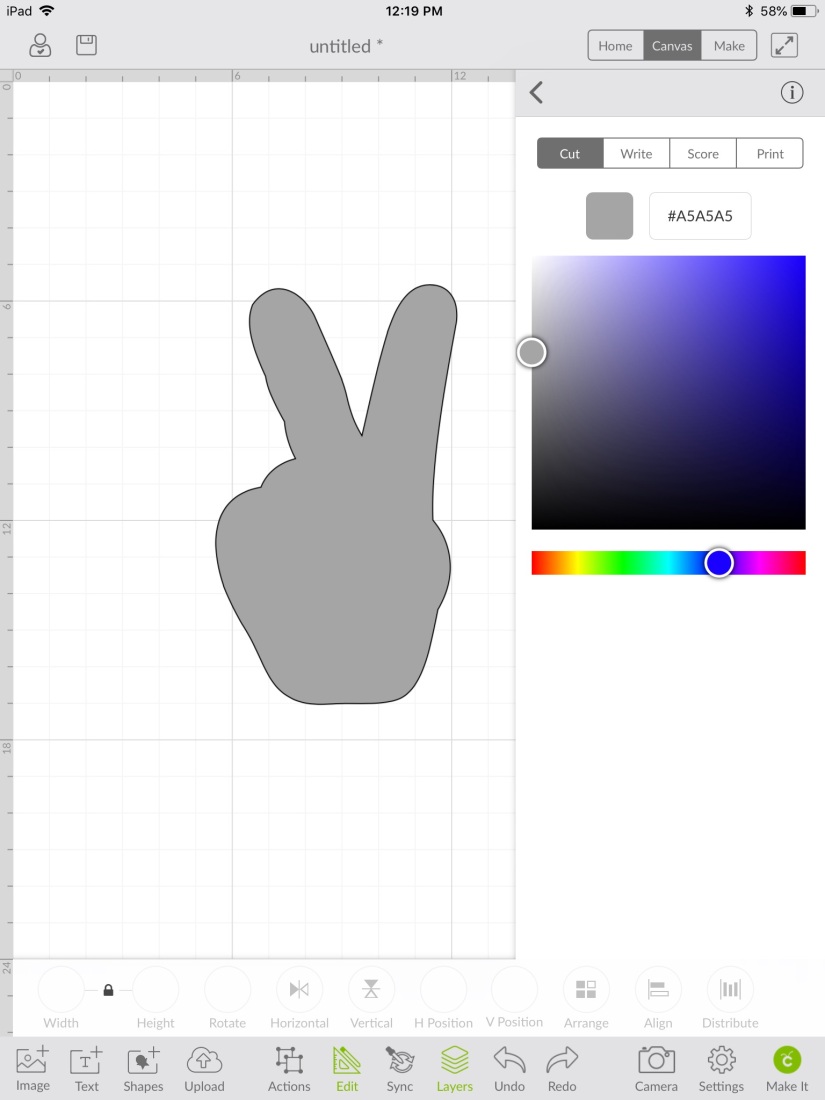
Step 4: I changed the colour to grey because I thought I was going to use silver vinyl and I wanted to be able to visualize what it would look like. This isn’t a necessary step.
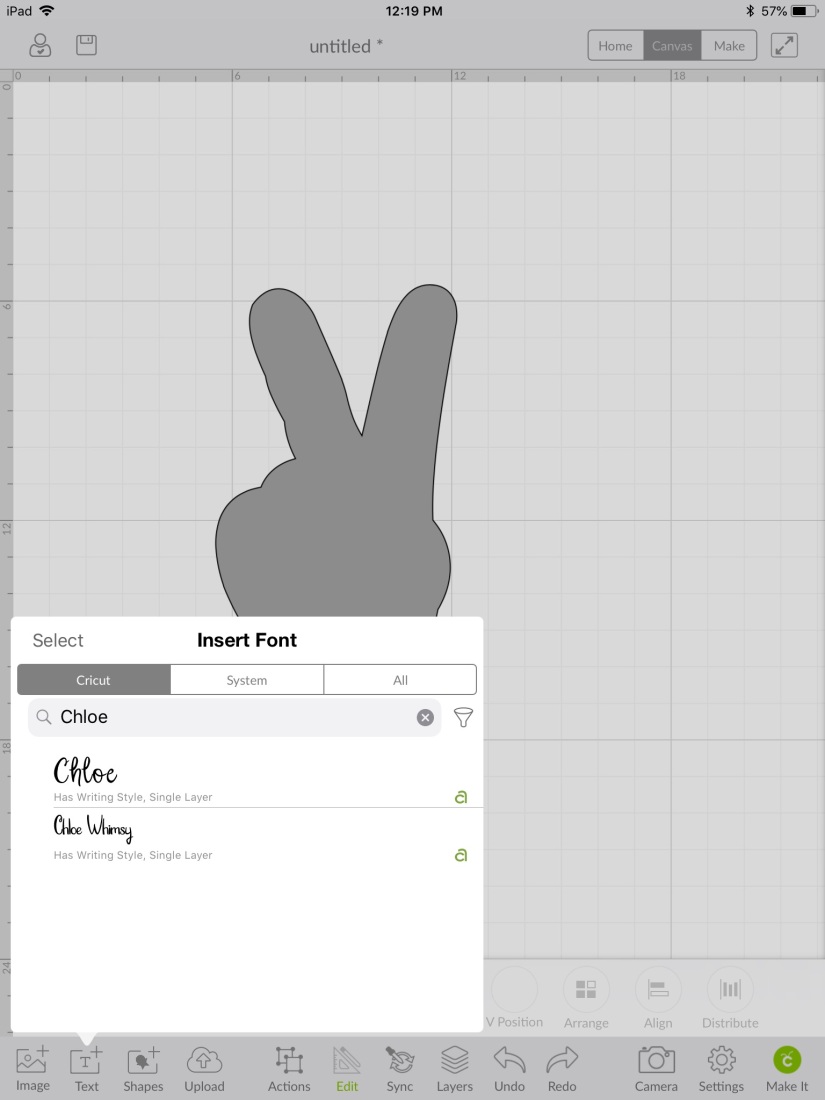
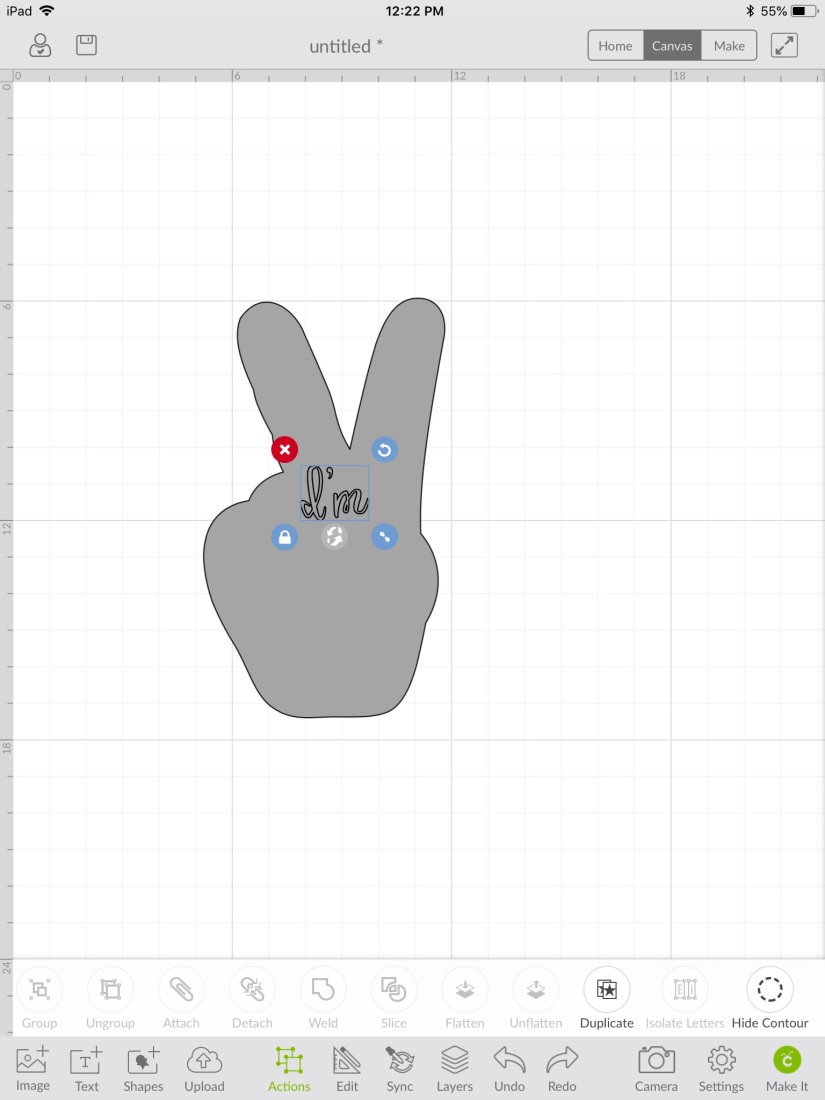
Step 5: Pick a font you’d like to write in. Chloe is a favourite of mine because it’s easy to read while also whimsical.
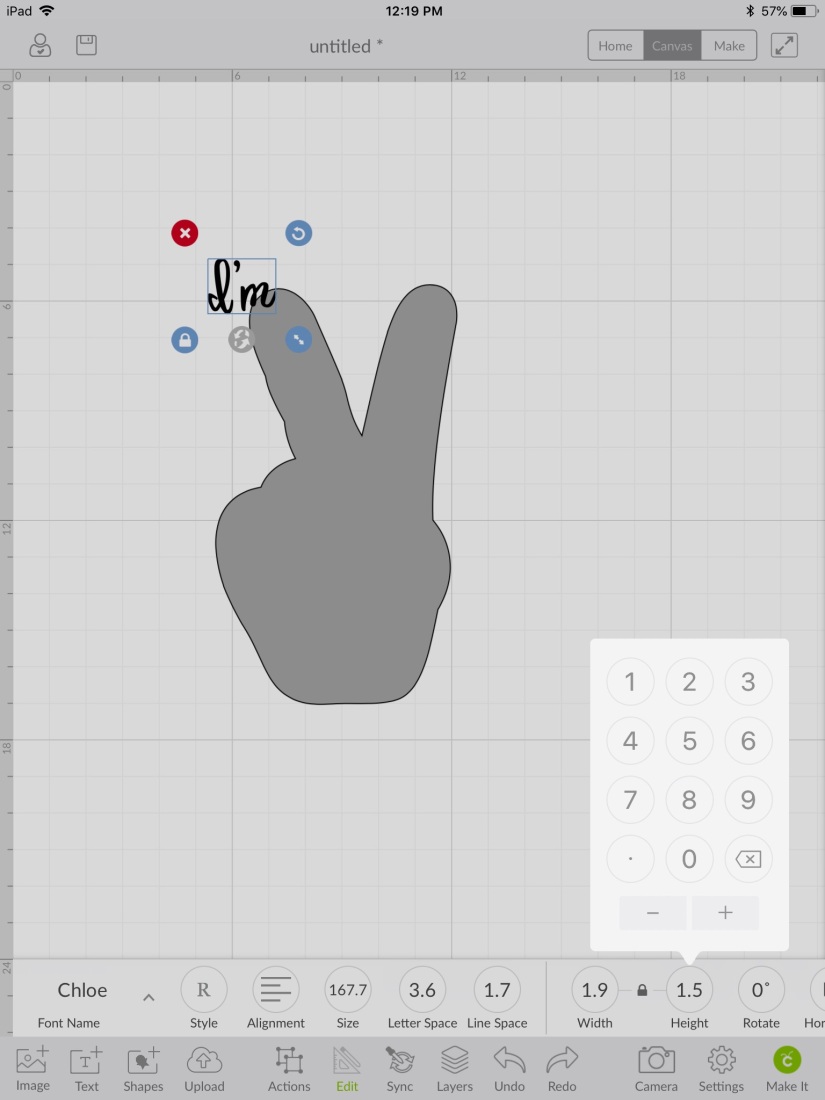
Step 6: I chose to write “I’m this many” so I typed each word individually so I could have more control over the spacing.
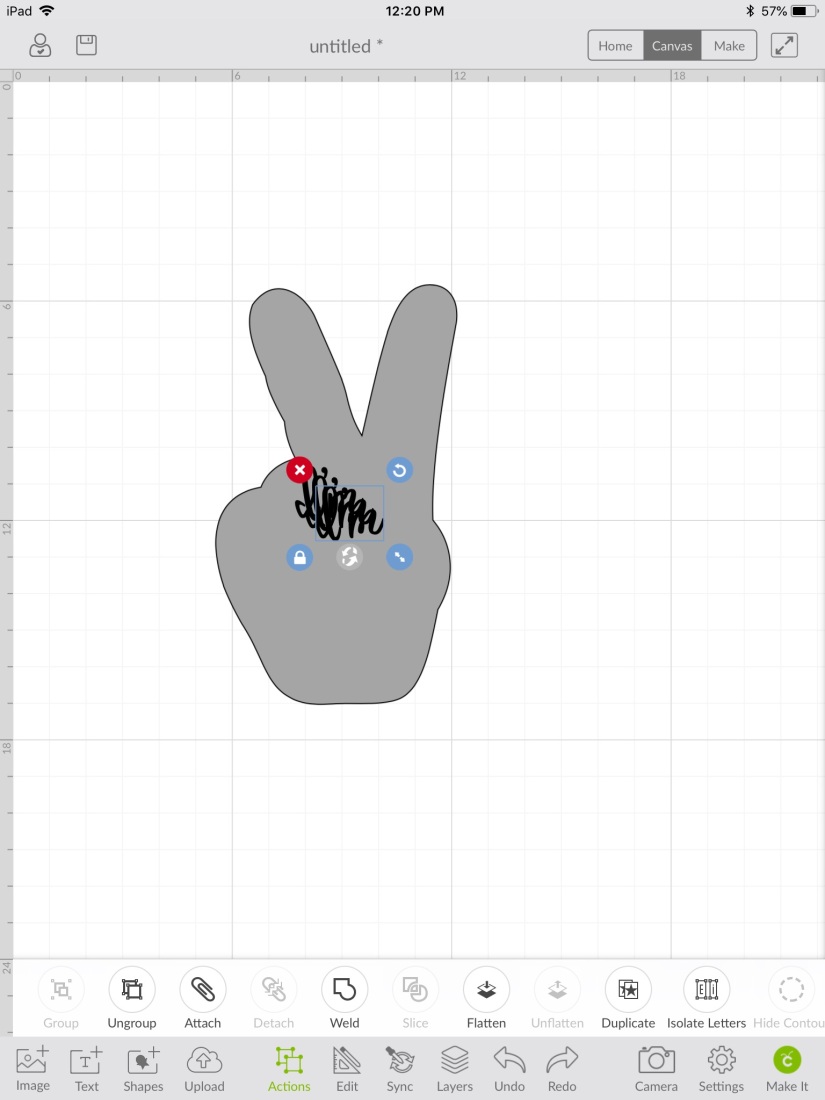
Step 7: I duplicated the font and changed the typing so that each font box would match in size.
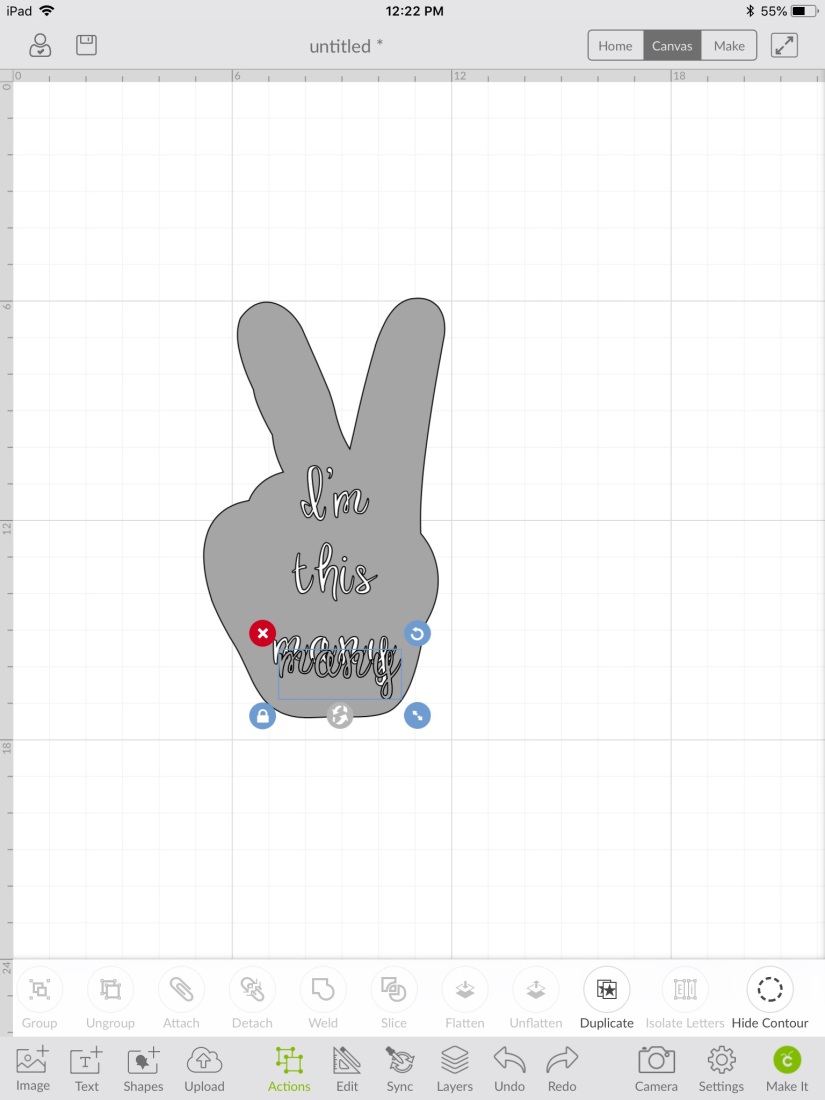
Step 8: I used the grid background to space the text boxes evenly apart vertically.
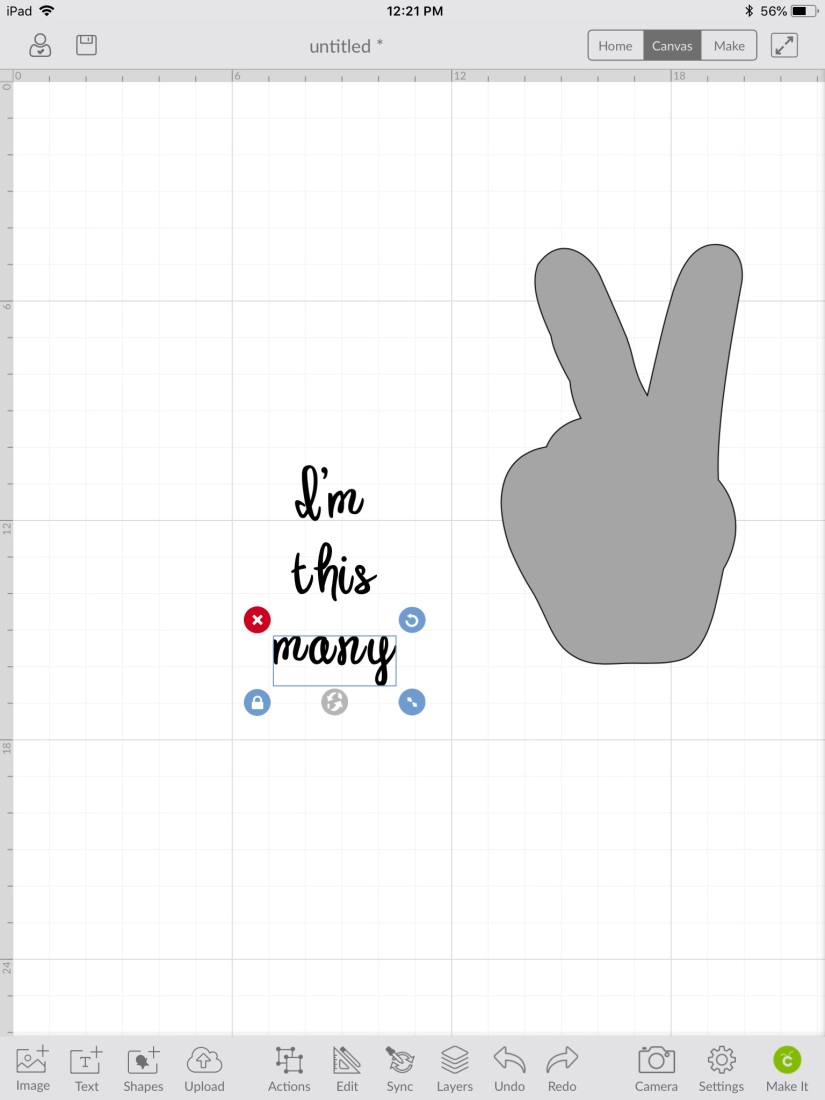
Step 9: Then, I highlighted all three boxes and aligned them by clicking “Align” then “Align centre” (Side note: my writing is constantly being spellchecked and underlined because I’m giving a tutorial on an American app while trying to use British/Canadian spelling. Oi.)
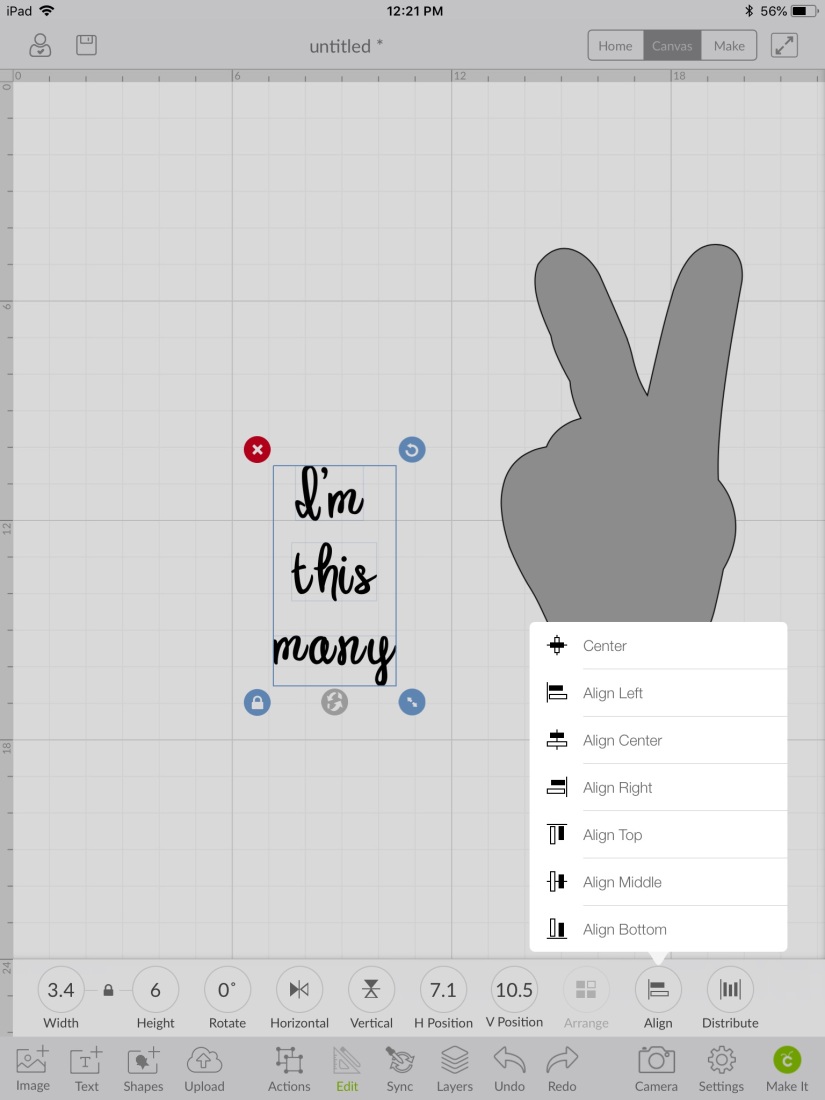
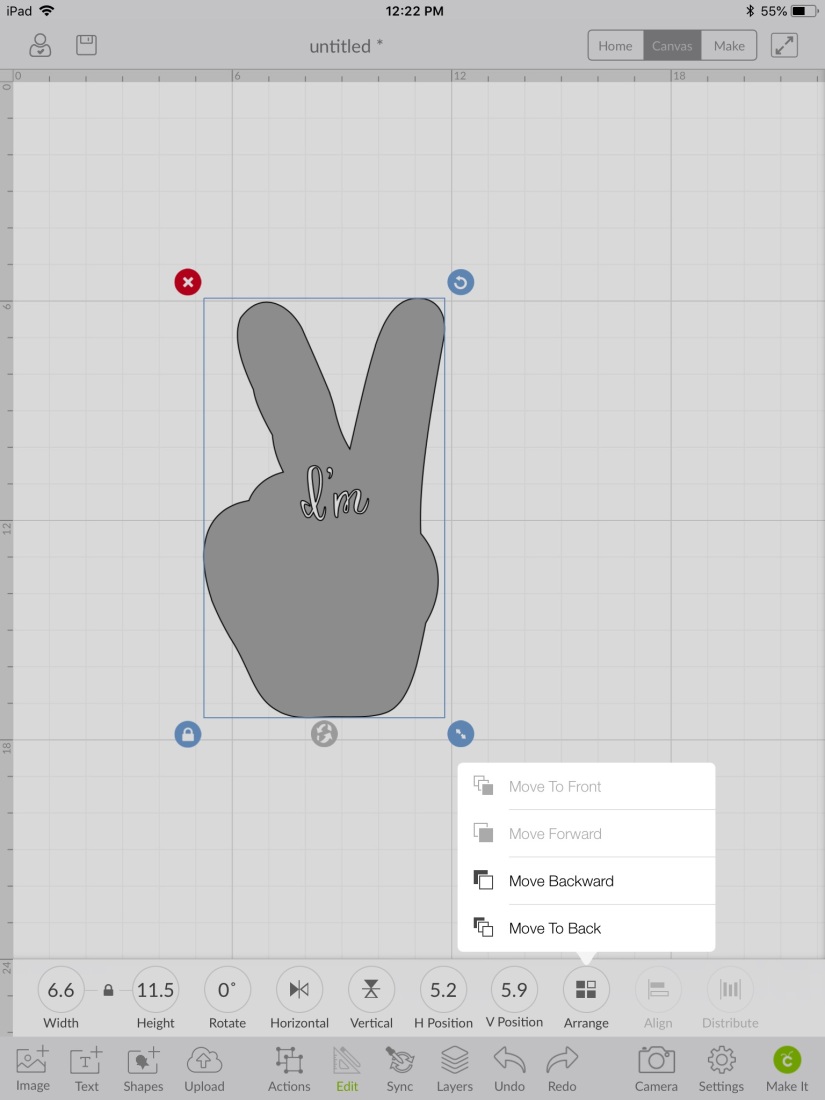
Step 10: I dragged my hand back behind the new font and clicked “Arrange” then “Send to back”. This part I didn’t have the program align because it is slightly off-centre but it looks more polished this way.
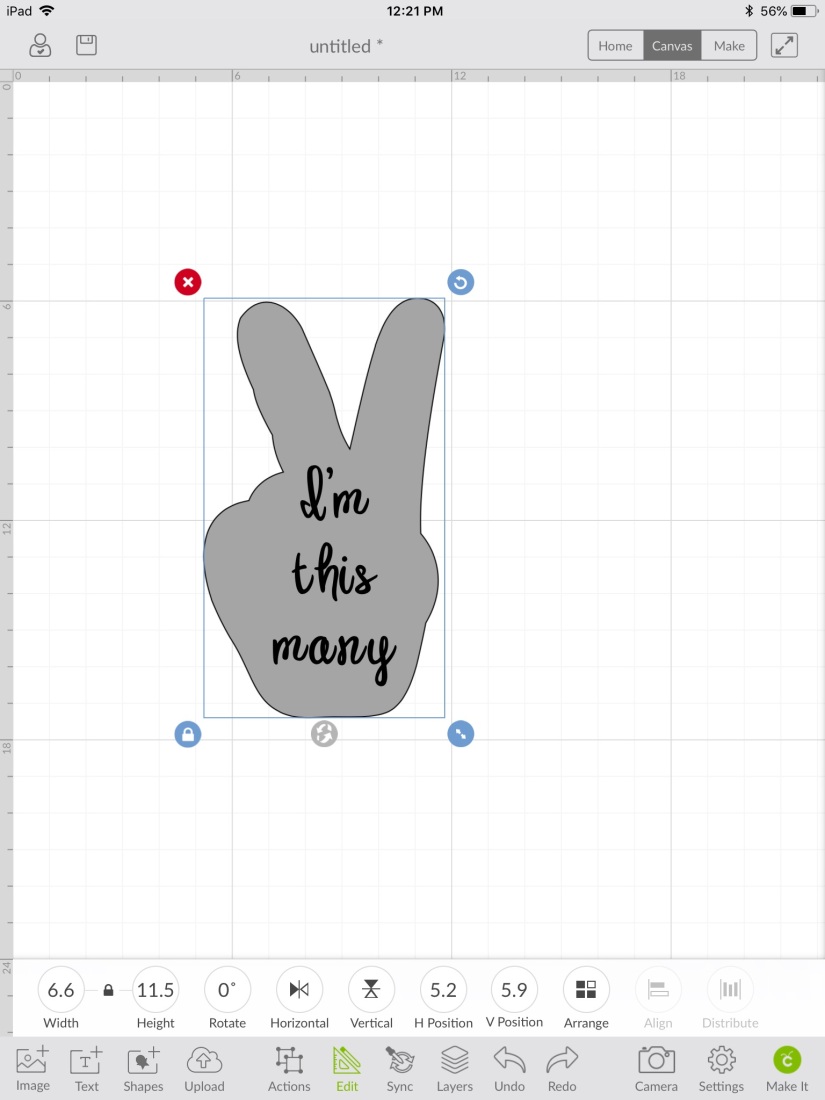
Step 11: Drag a box around the “I’m” text box and the hand. The button “slice” should be clickable. It will send the other 2 text boxes to the back.
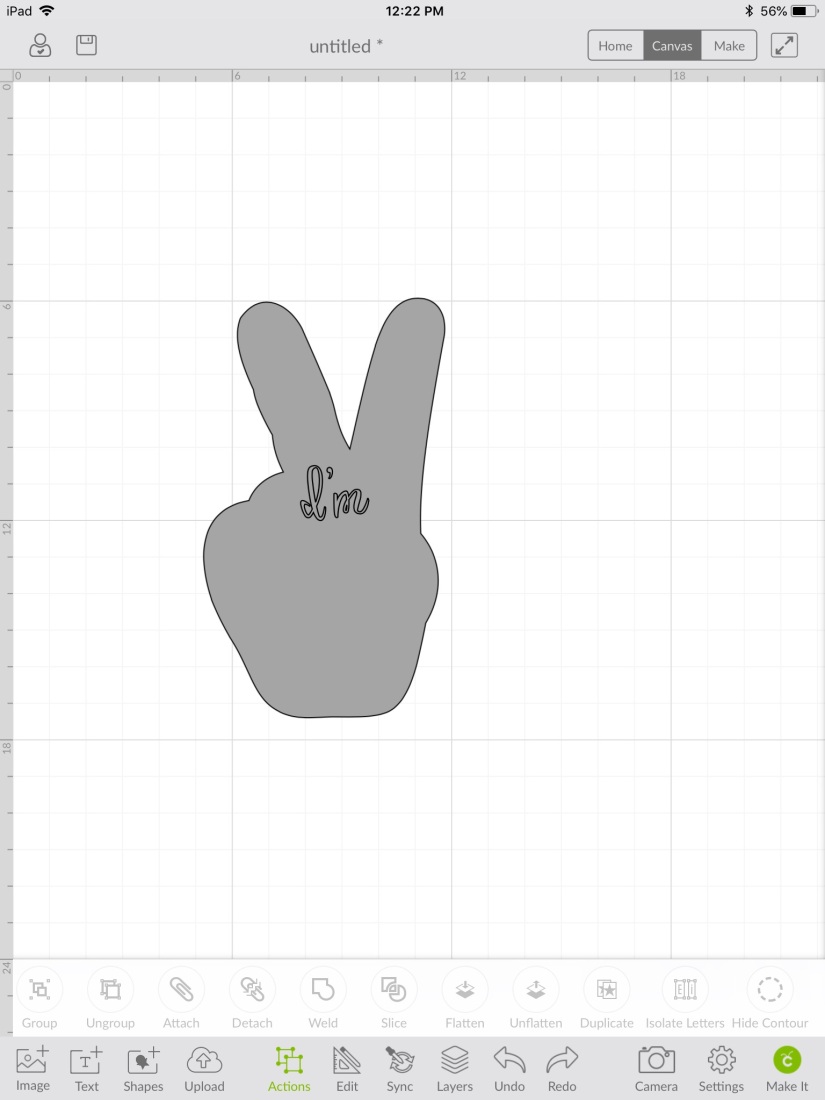
Step 12: Click the “I’m” box and delete. Now you should be left with a hand and “I’m” is cut out.
Step 13: Click the hand layer then “Arrange” and “Move to back”.
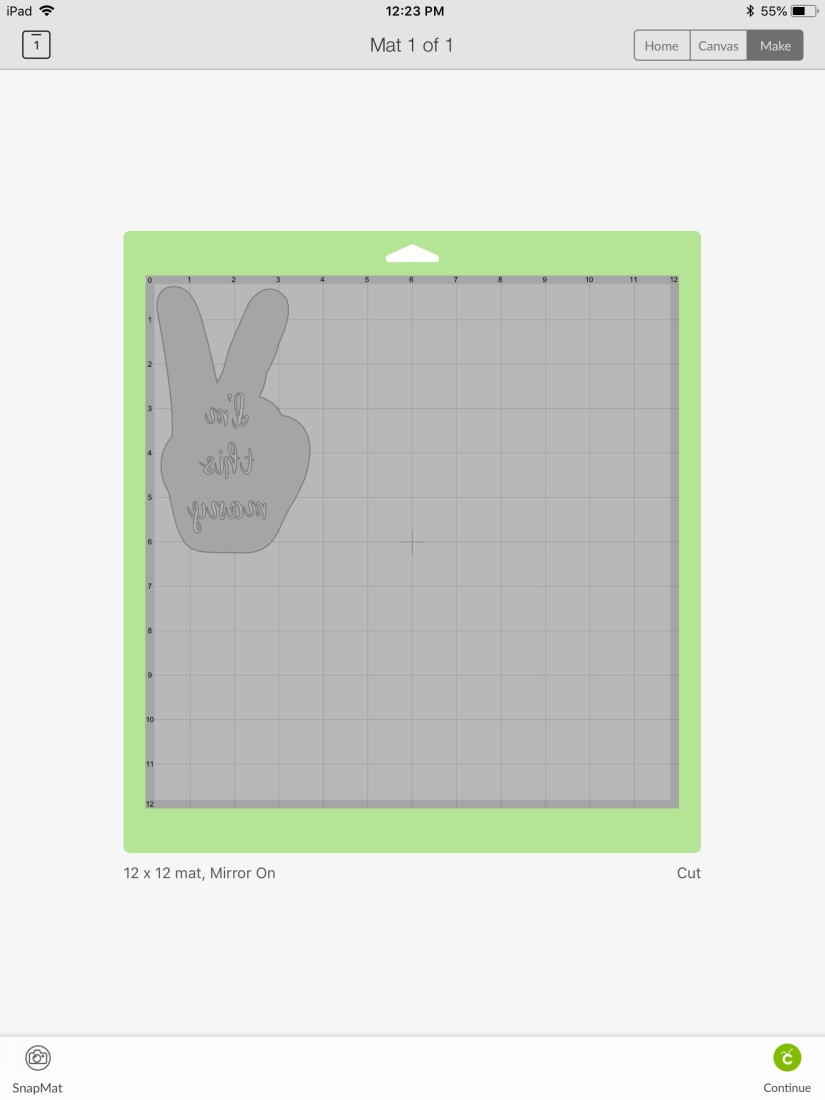
Step 14: Continue the same process with the other two text boxes. Delete the remaining gray font until you’re left with your final product.
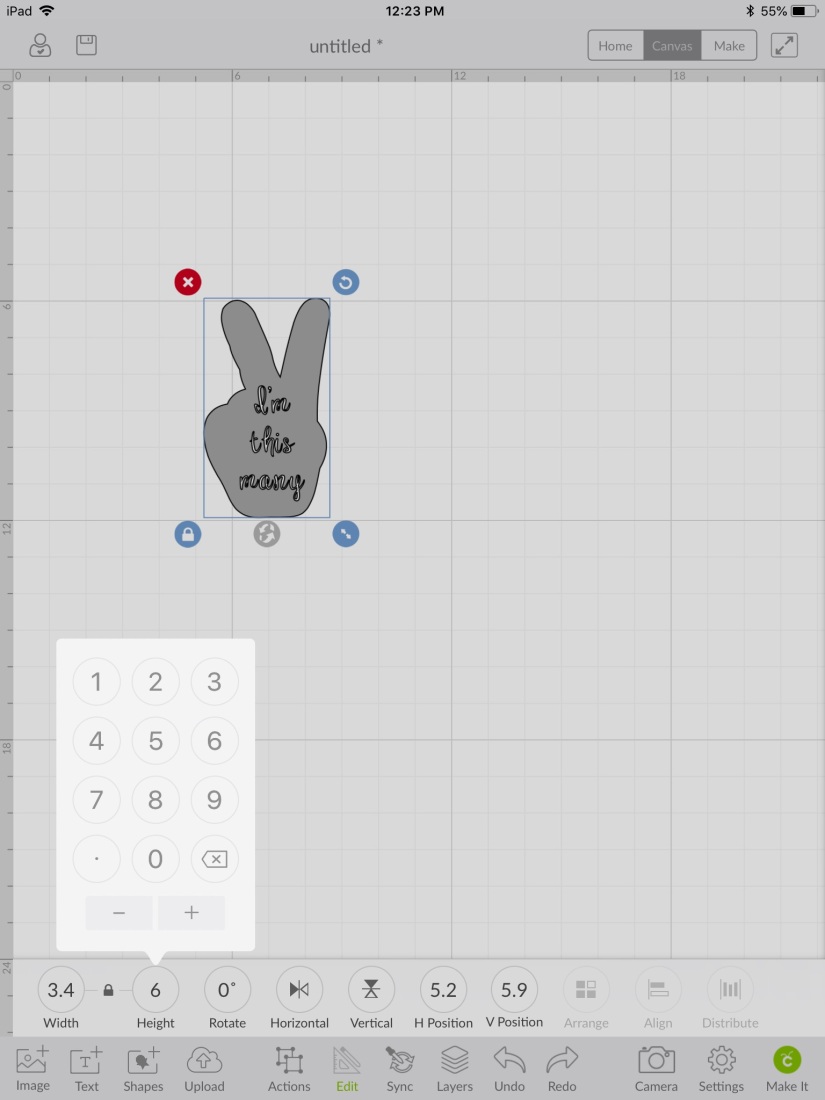
Step 15: I knew on a 2T shirt that a 6 inch logo would work, but yours may be different. I held my cricut mat up to the shirt to try to visualize.
Step 16: You can start to create! Make sure when you’re cutting iron-on that you mirror it first. Cut it out!
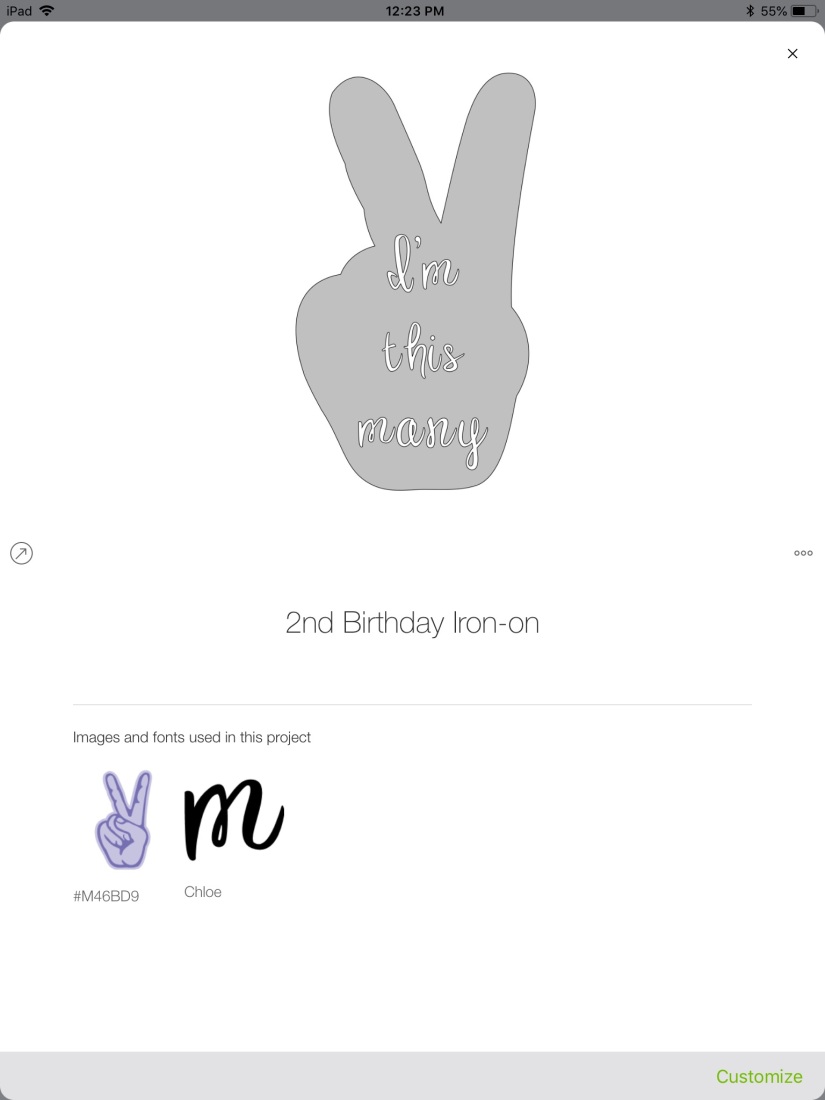
Step 17: Here’s a shot of the images and fonts I used. All free with a cricut subscription.
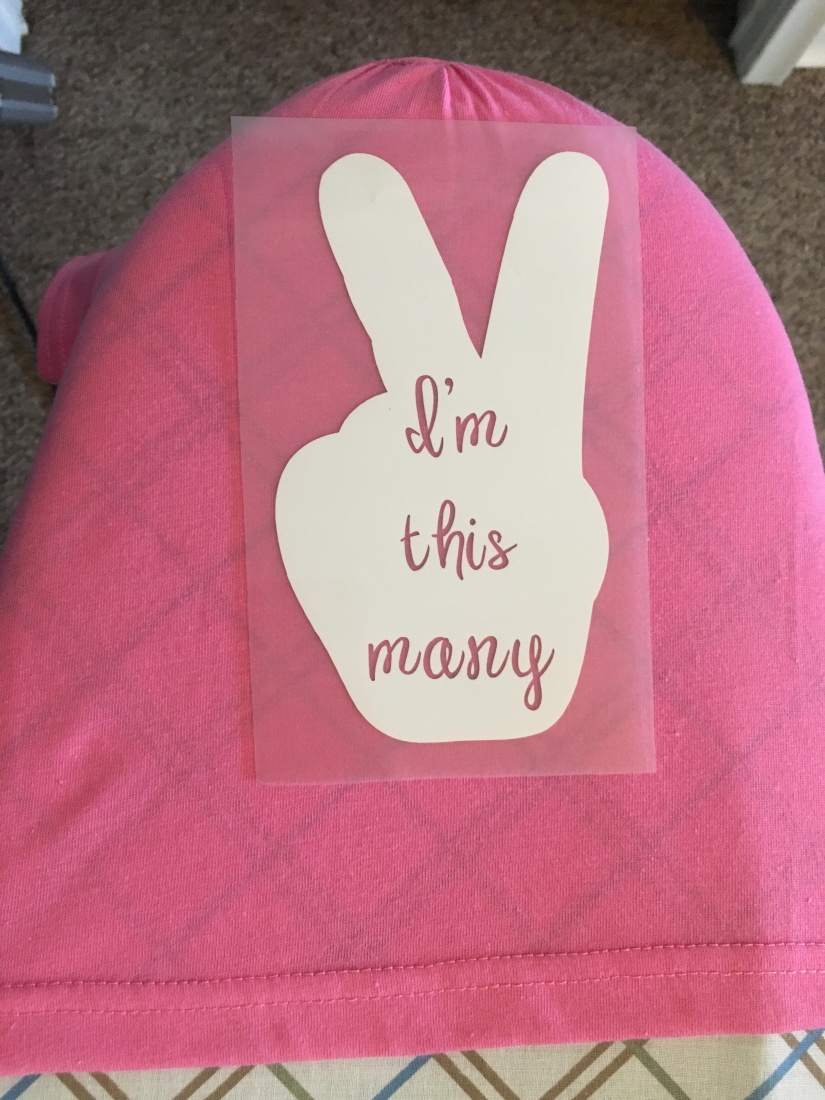
Step 18: After you’ve weeded the negative vinyl (you can find a more in-depth tutorial on weeding here), place it on the shirt to find the placement. I eyeballed it. What’s the worst that can happen?
Step 19: I had the iron set to cotton and I used a kitchen towel between the iron and the shirt. It didn’t take long for it to fuse. To see what vinyl I used and for more on ironing vinyl visit another tutorial of mine here.
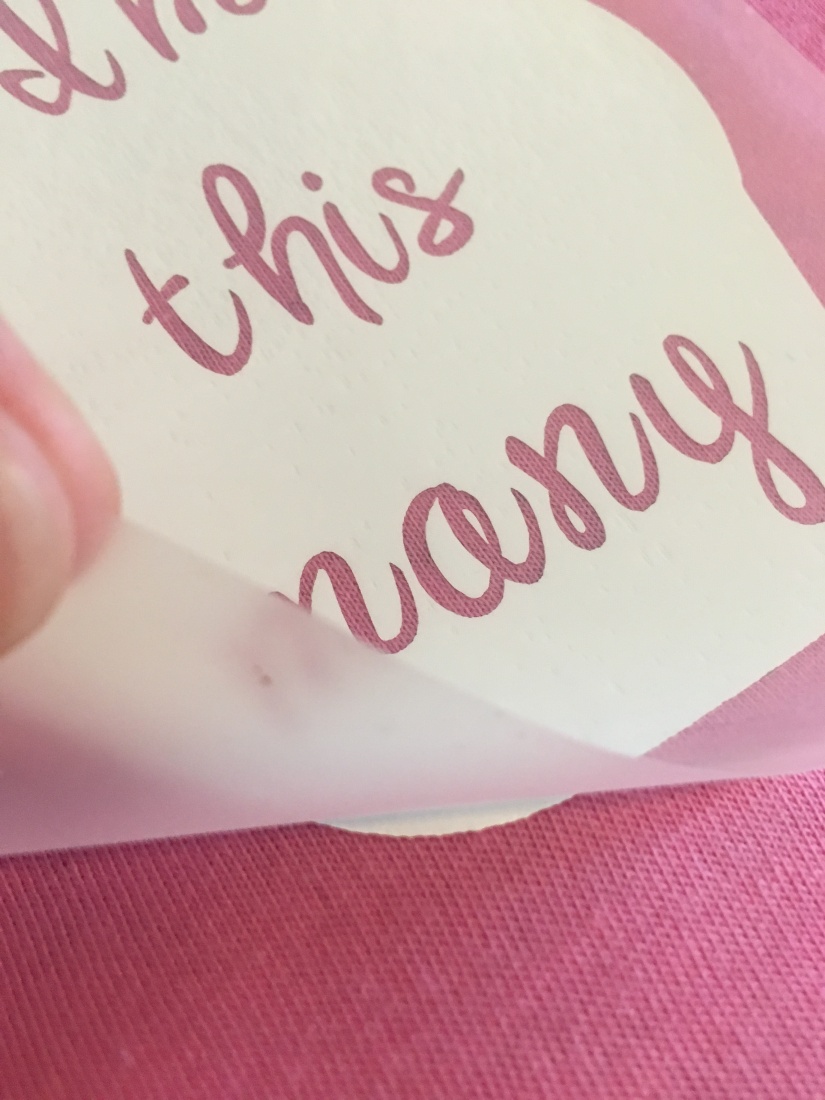
Step 20: Let it cool and you have a homemade birthday shirt!
