

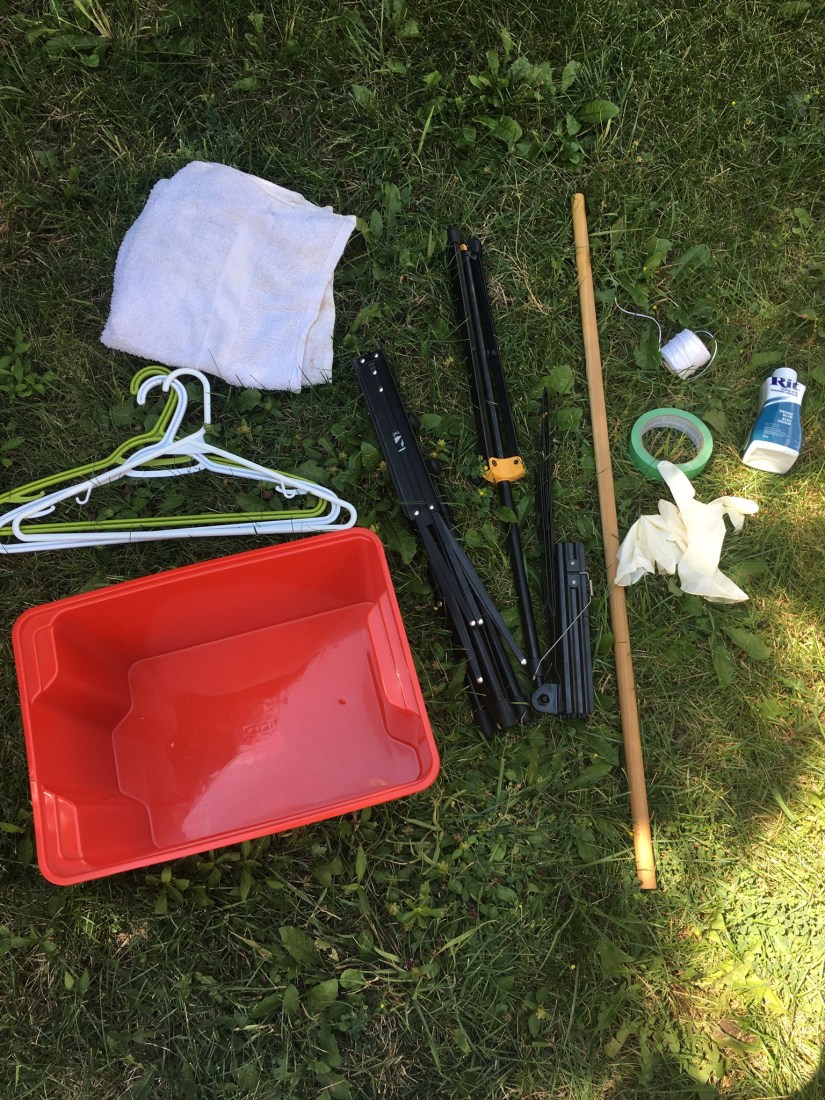
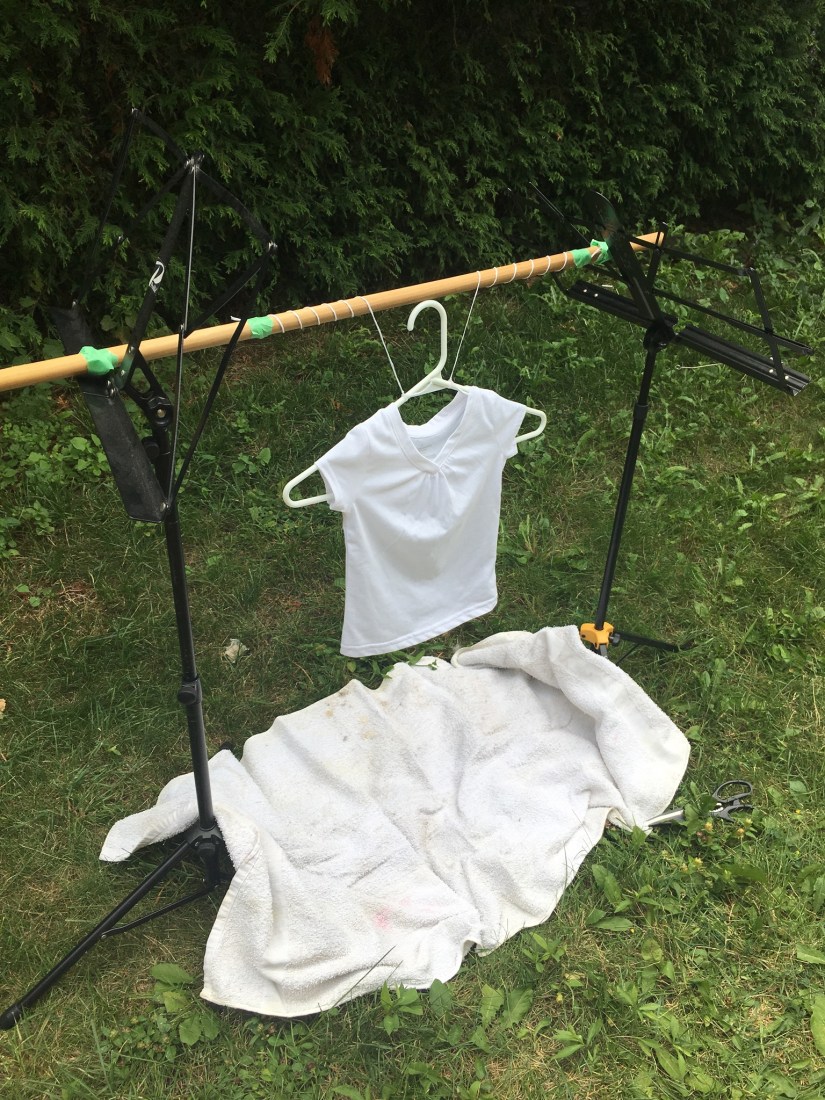
Step 1: Make sure you have all the items you need before beginning. Here’s what I used:
- Bucket (I will use a wider bucket next time)
- A hanger for each item you’re dying
- Rit dye in a colour of your choice
- Gloves
- Towel
- A system for dipping your clothes in stages. I used two music stands, a piece of doweling and string.
- White clothing to dye. Cotton seems to work best.
*Not pictured-I ended up using another bin for drips
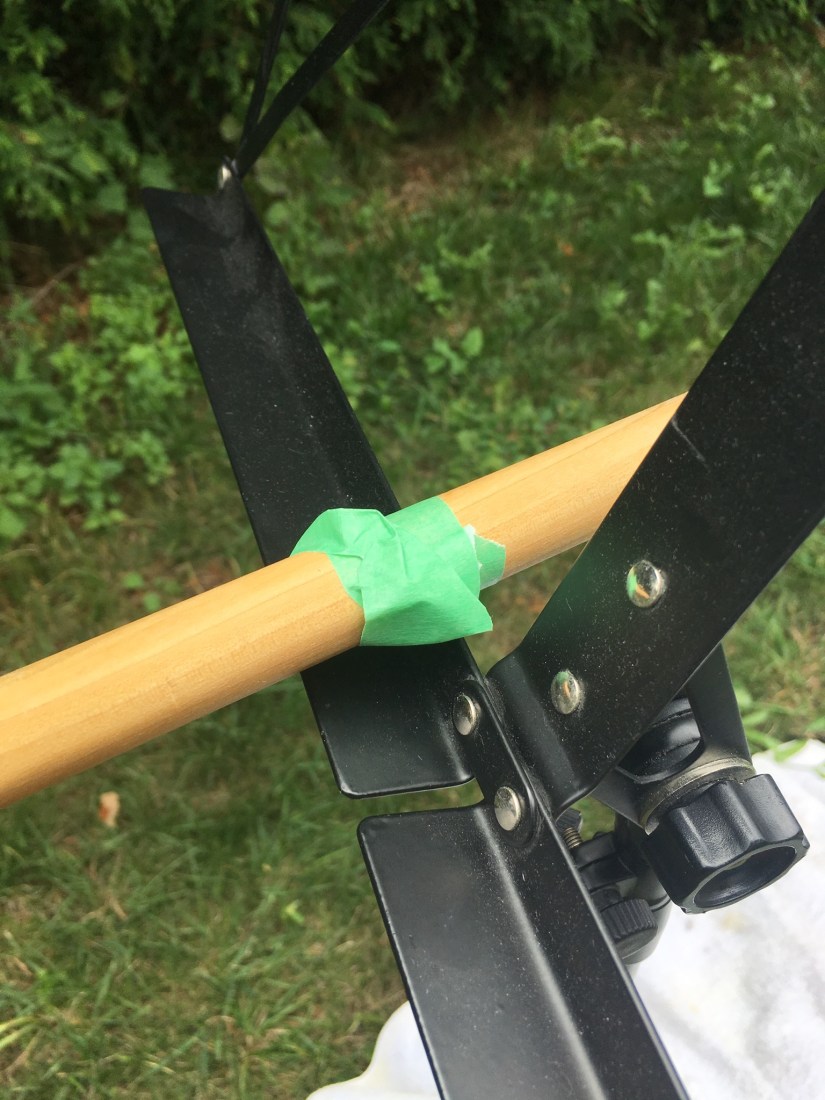
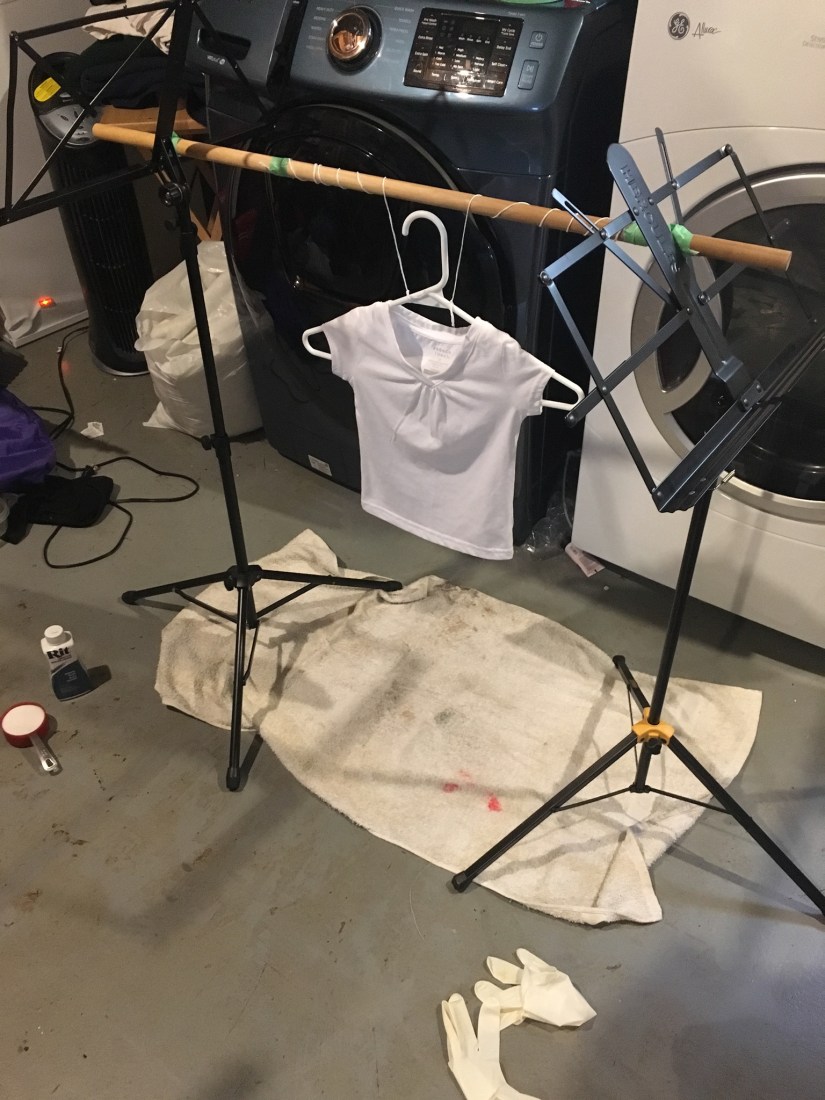
Step 2: Set up the hanging system. I liked how easy it was to adjust the height when using the music stands. I added tape where the doweling sat to add some traction.
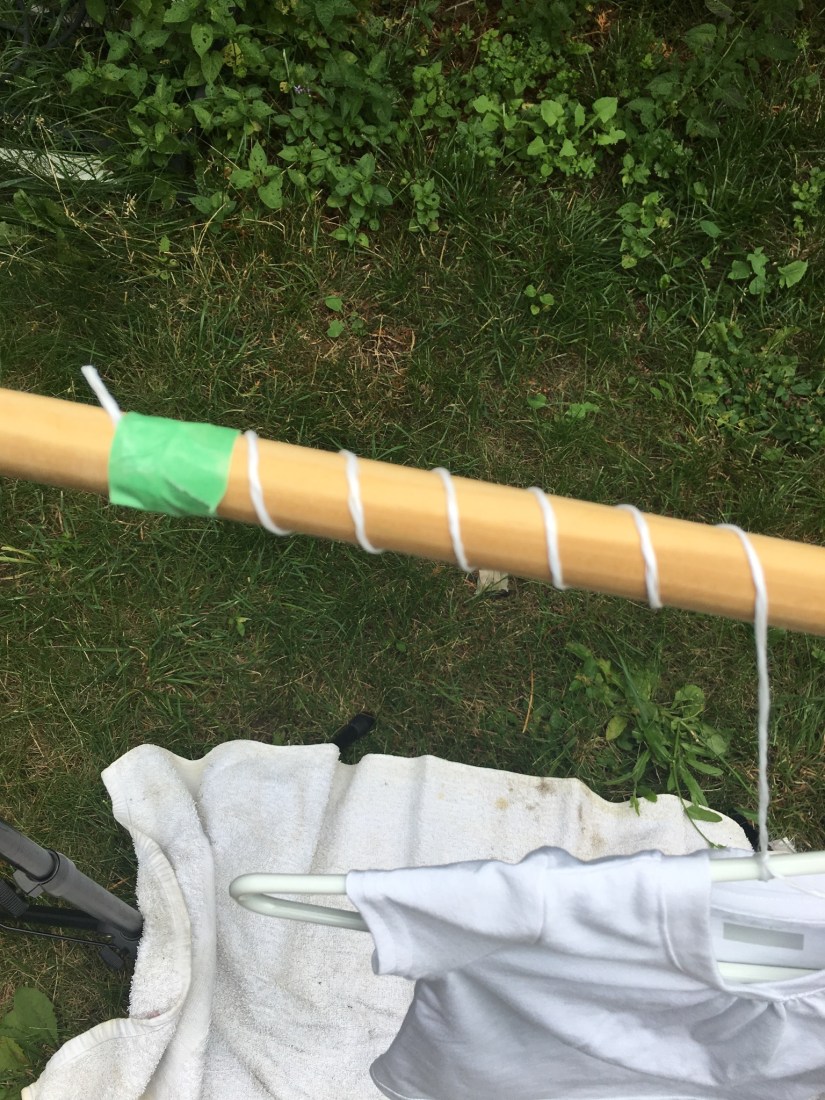
Step 3: Next, I tied two pieces of string onto the doweling. I taped it in place so it wouldn’t spin.
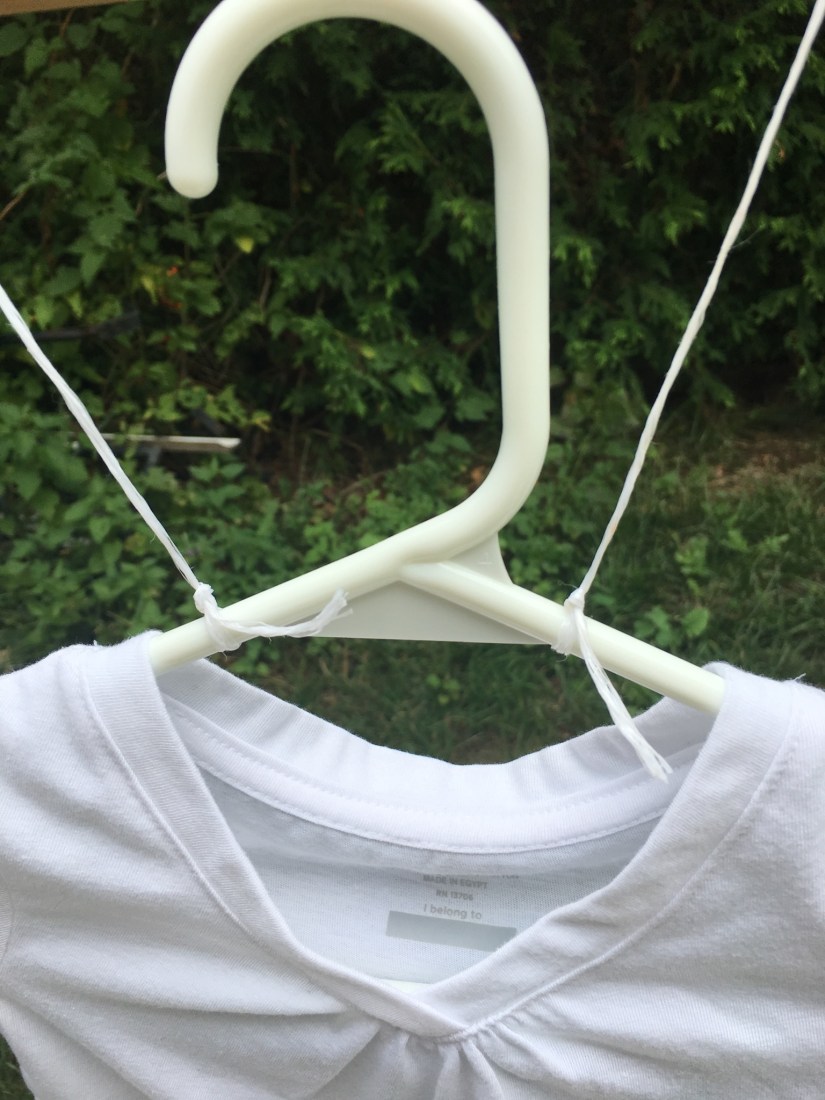
Step 4: Tie the other ends of the string to the hanger. Now you can turn the doweling to raise or lower your garment into the dye.
Step 5: Place a towel or drop sheet underneath. As soon as I’d gotten all set up, the thunder started. So I took it all down and tried again in my basement laundry room.
Step 6: I didn’t get any pictures of the bucket being filled. I started by boiling water in a kettle. While I waited, I added a 1/2 cup of salt to my bucket. Once the water was done, I measured 5 cups of boiling water to the bucket. Then I added 15 more cups of hot tap water. I stirred it a bit. Then I added half the container of liquid rit dye. I used denim blue.
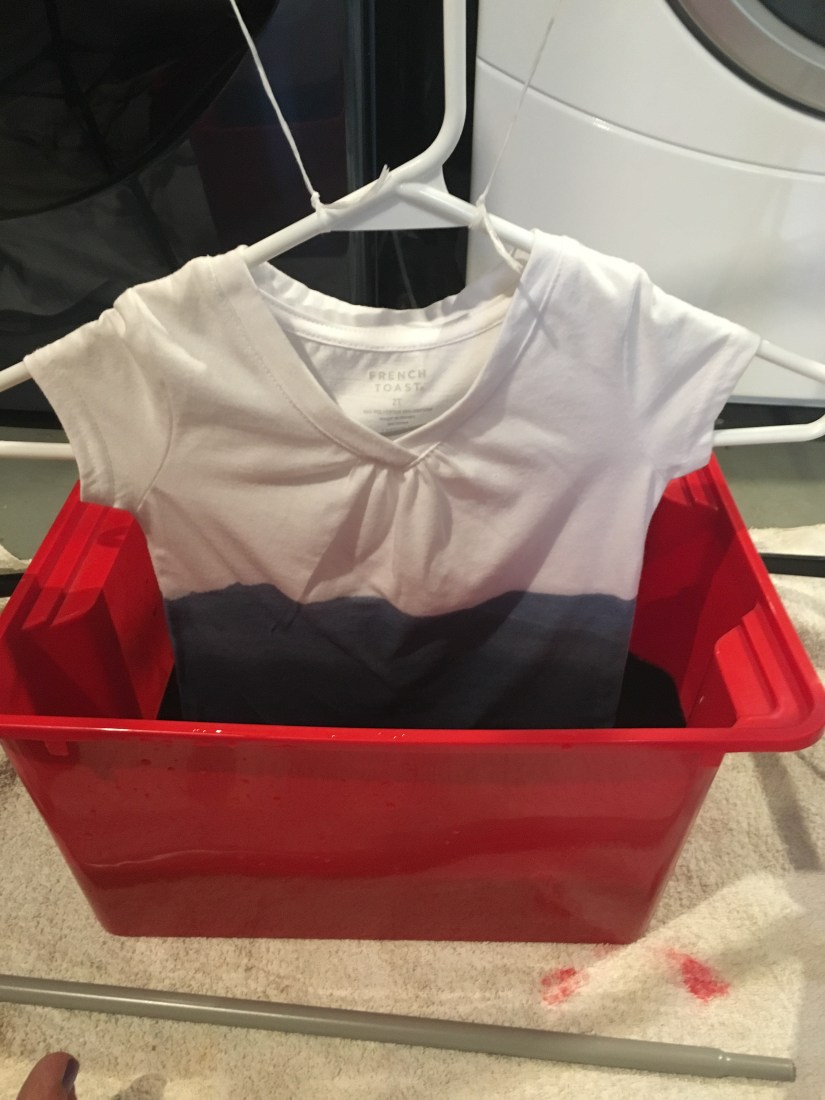
Step 7: Here’s where I made my first mistake. The shirt could only go this far into the dye because my hanger was wider than my bucket. No biggie. I ended up liking how it turned out. The first chunk was a quick dip then I rolled it up for the second section, which dipped for 1 minute.
Step 8: The last section was left for 5 minutes. Once it was done, I slipped it on a new hanger and left it to drip on the drying rack with an empty bucket underneath.
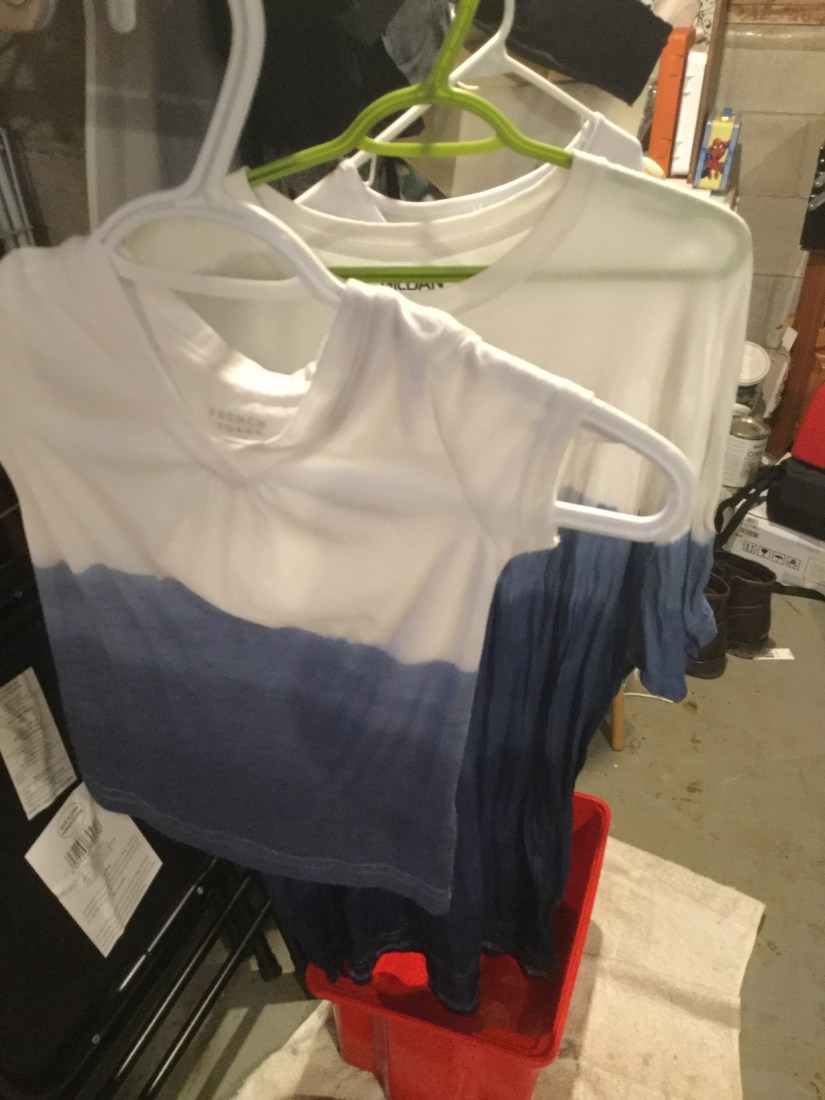
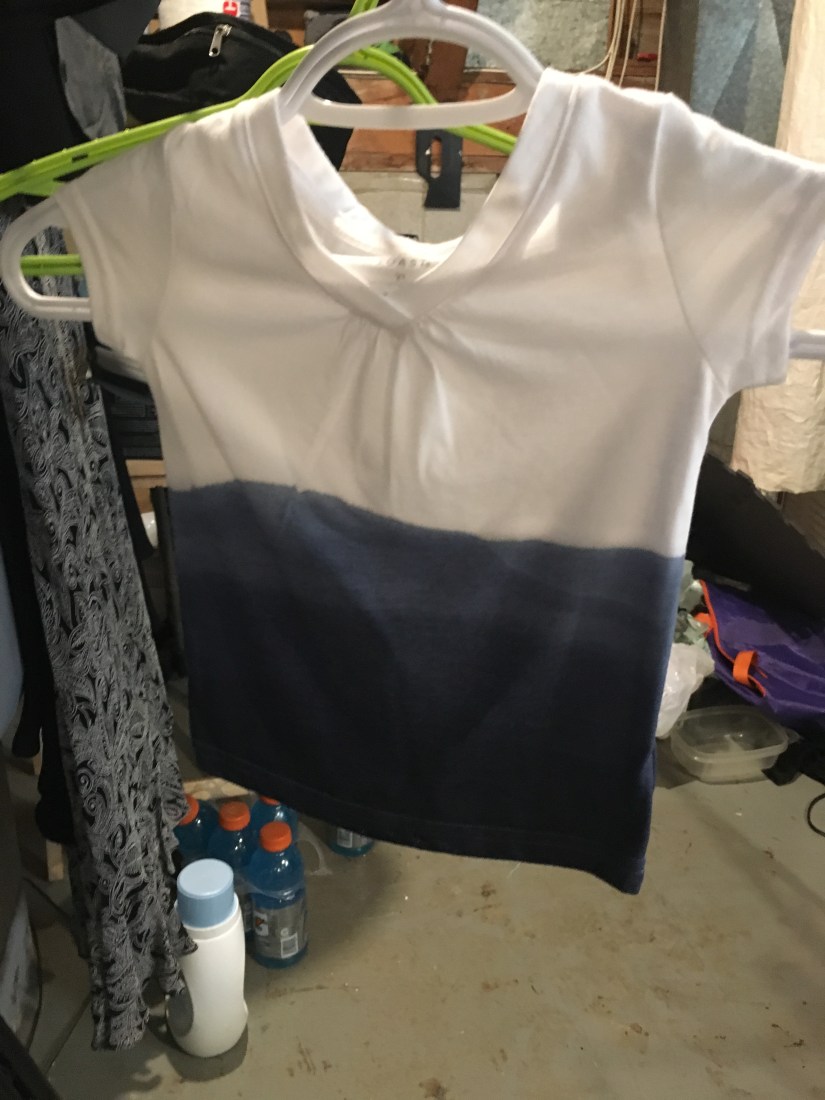
Step 9: Rinse in cold water. I held it by the hanger and washed it in the shower. I didn’t mind having the dye drip because we’re due for a new bath. It did slightly stain it, even after I used a magic eraser. Rinse until it runs clear. This took some doing for me.
Step 10: Hang to dry then put in the laundry on a warm wash.
I also dyed 2 other shirts. The first one was my daughters and it was 50% cotton, 50% polyester. The second one was my husbands and it was 100% cotton.

My shirt was last and it didn’t turn out very well. The label says 65% cotton and 35% polyester. It has a very different texture than the other two shirts and I paid quite a bit more for it so I was bummed. It turned out more purple than blue and it was a more subtle line between sections.
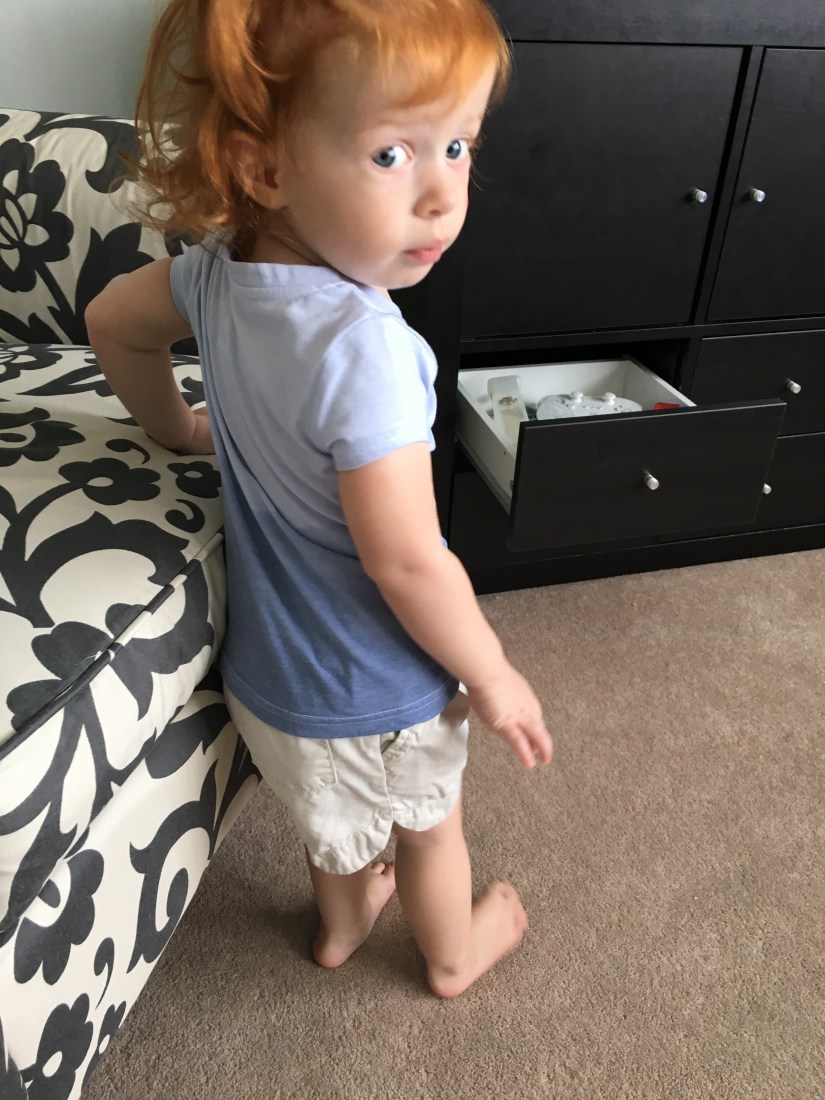
Here is the final result on my daughter. As you can see the blue dye ran into the white in the wash. I assume this is because I was lazy about rinsing out the dye in cold water before washing in the machine. I really like the end result. It was a fun project I was able to mostly finish during a nap. It wasn’t too messy because I had prepared everything beforehand.


Maybe a colour catcher in the washer would have stopped the blue from running into the white.
LikeLike
I’m trying that next time! And there will be a next time because it was so fun!
LikeLike